How to set up MFA (Multi Factor Authentication) on your Microsoft 365 Account
This document will show you how to set up 2FA/MFA (2-factor authentication/multi factor authentication) to improve security on your Microsoft account. When logging into new devices you will be required to use your phone to log in.
Part 1: Install Microsoft Authenticator app
- On your mobile phone, go to the App Store (for iPhones/iPads) or Play Store (for Android), search for and install the Microsoft Authenticator This tutorial uses Android in the pictures but setup is similar on Apple devices. Don’t open the app yet.
Part 2: Visit your computer
- Move to your computer for a moment and visit aka.ms/mfasetup
- In the Sign In box, add your email address. Click Next and enter your usual password.
- Click Sign In. You may be asked to stay signed in. Select yes.
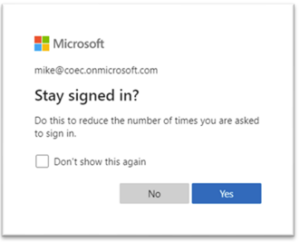
- You will now see a More information required screen. If you don’t, it may mean two-factor authentication has already been set up.

- Click Next.
- The page will open asking you to install Microsoft Authenticator on your mobile phone.
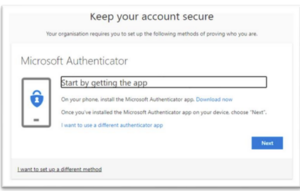
Part 3: Return to your phone
- Open your phone and open the Microsoft Authenticator
- If there are questions about data privacy and usage, please press OK or Accept.
- Click “Scan a QR code” on the following screen.
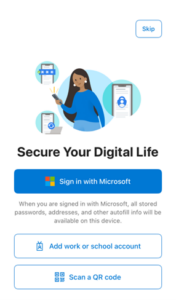
- You’ll then be asked to allow authenticator to access your contacts. It will not use your contacts however this access is required to enable the app to work. Press Allow.

- Press Allow for Allow Authenticator to take pictures and record video. This step is necessary and pictures will only be taken when the app is in use.

- The QR code scanner will now open on your phone from within the Authenticator app.
Part 4: Return to your computer
- Return to your computer and the browser window you opened previously. You should see a Keep your account secure page. Click on Next.

- The page pictured will appear. Click on Next.
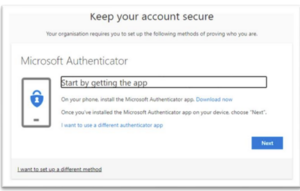
Part 5: Final steps
- When the screen with the QR code appears, move back to your phone.

- Use your mobile phone to scan the code.
- If you’re asked to accept notifications on your mobile phone, press “yes”, “allow” or “got it”.
- Your Office 365 account should now be added to the Authenticator app and look like the screen below. Note the 6-digit number that is constantly changing. This is for your security.

- Go back to your computer and if the QR code screen is still appearing click Next.
- The following screen will appear.
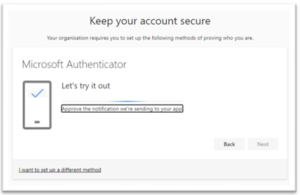
- Now we will test that authenticator is working. An “approve sign-in request” screen with a number should appear on the computer screen when you complete the previous step.
- An “approve sign-in” notification will appear on your mobile phone. Enter the two-digit number from your computer screen into your mobile phone and press ‘Yes’. You may be prompted for your mobile PIN or fingerprint, this is OK.
- The page on your computer should update to state that the notification has been approved, as shown here. Press Next.
- A screen showing “Success” will now appear. After pressing Done you will be directed to a page where you can manage your sign-ins. There are no further steps to take. Your account is now secure.